folderchat
folderchat - One of the easiest ways to chat with your folders
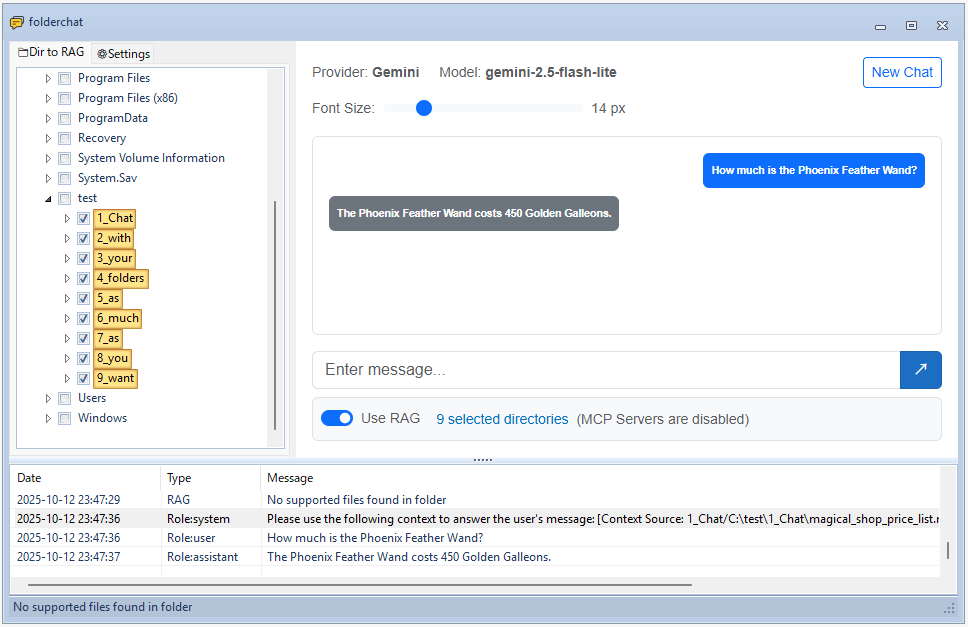
folderchat is a Windows desktop application that provides an AI chat interface enhanced with Retrieval-Augmented Generation (RAG) capabilities. It allows you to have conversations with AI models while providing relevant context from your local documents and folders.
Features
- Multi-Provider Support: Works with OpenAI-compatible APIs, Claude Code CLI, and others
- RAG Integration: Automatically processes and indexes documents from selected folders to provide contextual information
- MCP (Model Context Protocol) Support: Enables LLMs to interact with external tools and services through MCP servers
- Native Embedding Support: Includes local embedding model support (Gemma) for offline RAG functionality without external API dependencies
- Blazor WebView UI: Modern web-based chat interface within a Windows Forms application
- Document Processing: Converts various document formats to markdown for better context understanding
- Configurable Settings: Customize API endpoints, models, embedding settings, and more
- Folder Selection: Choose specific directories to include in your knowledge base
Prerequisites
- Windows 10 or later
- .NET 9.0 SDK
- Python 3.10+ (target PC)
- Optional: uv (you can use uv, but pip + requirements.txt is also supported)
Installation
Build from Source
- Clone the repository:
git clone https://github.com/straygizmo/folderchat.git cd folderchat - Build the solution:
dotnet build .\folderchat.sln - Output will be in
folderchat\bin\Debug\net9.0-windows\
Build for Distribution (Publish)
This project uses Blazor WebView inside a Windows Forms app. To create a distributable build that runs on another machine, publish the app so that all required assets (including wwwroot and python_tools) are copied into a single folder.
- Target OS: Windows x64
- Framework: .NET 9.0 (desktop)
- UI runtime: Microsoft Edge WebView2 (Evergreen)
Steps:
- Clean and publish
dotnet clean dotnet publish -c Release -r win-x64 --self-contained false - Publish output
- Location:
folderchat/bin/Release/net9.0-windows/win-x64/publish/ - Copy the entire contents of this
publishdirectory to the target PC (e.g.,D:\apps\folderchat\).
- Location:
- Requirements on the target PC
- Install .NET 9 Desktop Runtime (required when
--self-contained false) - Ensure Edge WebView2 Runtime (Evergreen) is installed. If missing, the app may prompt you to install it on first run.
- Install .NET 9 Desktop Runtime (required when
- Run
- Execute
folderchat.exefrom the publish folder - The app loads the chat UI from
wwwrootrelative to the executable
- Execute
- Optional: Self-contained build (no .NET runtime required)
dotnet publish -c Release -r win-x64 --self-contained true- Produces a larger output folder but removes the need to install .NET runtime on the target PC.
Notes:
- Static web asset manifests are removed during build/publish to avoid absolute path issues on other PCs; the
wwwrootfolder is copied into the output so Blazor WebView resolves assets relative to the app directory. - The
python_toolsfolder is copied automatically into both build and publish outputs. Do NOT publish a local.venvunderpython_tools(it is excluded). On the target PC, set up Python dependencies by ONE of the following:- pip (recommended when uv is not available):
py -m venv python_tools\.venv python_tools\.venv\Scripts\pip install -r python_tools\requirements.txt - uv (optional):
cd python_tools uv sync - portable Python (optional): bundle a relocatable Python as
python_tools\python.exe(e.g., WinPython) and then run:python_tools\python.exe -m pip install -r python_tools\requirements.txt
- pip (recommended when uv is not available):
- LLamaSharp CPU native DLLs are streamlined to include a compatible
noavxvariant to avoid duplicate publish conflicts. This improves portability across CPUs; for AVX-specific builds, adjust the project configuration as needed.
Python Tools Setup (Required)
Python tools are required for document processing, chunking, and embedding functionality. folderchat uses Python for:
- Document conversion (MarkItDown)
- Text chunking and processing
- Embedding generation
Setup Instructions
Choose ONE of the following ways to prepare Python on the target PC. Do not redistribute a local .venv created on your dev PC.
A) pip (recommended when uv is not available)
- Create a venv inside
python_tools:py -m venv python_tools\.venv - Install dependencies:
python_tools\.venv\Scripts\pip install -r python_tools\requirements.txt
B) uv (optional)
- Navigate to the
python_toolsdirectory:cd python_tools - Install dependencies:
uv syncNote: The
.venvcreated by uv is NOT portable. Do not copy it to other PCs; always create it on the target PC.
C) Portable Python (optional, no system install)
- Bundle a relocatable Python runtime as
python_tools\python.exe(e.g., WinPython). - Install dependencies with that interpreter:
python_tools\python.exe -m pip install -r python_tools\requirements.txt
This installs all required Python dependencies including:
- MarkItDown for document conversion (PDF, DOCX, etc.)
- Libraries for text chunking
- Embedding generation utilities
Note: Without proper Python tools setup, RAG functionality will not work correctly.
API Provider Configuration
folderchat supports multiple API providers:
OpenAI-Compatible APIs
- Base URL: Your API endpoint (e.g.,
http://localhost:1234for LM Studio) - API Key: Your authentication key
- Model: The model to use (e.g.,
gemma3)
Claude Code CLI
- CLI Path: Path to Claude Code executable
- Model: Claude model identifier
GGUF Models (Local Chat)
You can use local GGUF chat models without an external API. Place your GGUF model files in:
python_tools/models/chat/[provider_name]/[modelfile_name].gguf
For example, download a model from unsloth/gemma-3n-E4B-it-GGUF and place it as:
python_tools/models/chat/unsloth/gemma-3n-E4B-it-Q4_K_M.gguf
This allows you to run chat models entirely offline using LLamaSharp.
Embedding Configuration
For RAG functionality, configure embedding settings:
- Embedding URL: Endpoint for generating embeddings (e.g.,
http://localhost:1234for LM Studio) - Embedding Model: Model for embeddings (e.g.,
text-embedding-embeddinggemma-300m)
GGUF Mode (Local Embedding)
You can use local GGUF embedding models without an external API. Download GGUF embedding models from Hugging Face and place them in:
python_tools/models/embedding/[provider_name]/[modelfile_name].gguf
For example, download a model from unsloth/embeddinggemma-300m-GGUF and place it as:
python_tools/models/embedding/unsloth/embeddinggemma-300M-Q8_0.gguf
This allows you to run embeddings locally without requiring an external API service.
RAG Settings
- Context Length: Maximum context window size
- Chunk Size: Size of document chunks for processing
- Chunk Overlap: Overlap between consecutive chunks
- Top K: Number of most relevant document chunks to retrieve for context
- Total Max Context Length: Maximum total length of all retrieved context chunks combined
MCP (Model Context Protocol) Configuration
folderchat supports MCP servers that enable LLMs to interact with external tools and resources. MCP servers can provide file system access, API integrations, database connections, and more.
Setting Up MCP Servers
- Open MCP Settings: Navigate to Settings → MCP Server Configuration
- Add MCP Server: Click “Add Server” and configure:
- Name: A descriptive name for the MCP server
- Transport Type: Choose between:
- stdio: For local process-based MCP servers (most common)
- sse: For HTTP-based MCP servers
- Command/URL:
- For stdio: Path to the MCP server executable or script (e.g.,
python,node,npx) - For sse: HTTP endpoint URL
- For stdio: Path to the MCP server executable or script (e.g.,
- Arguments: Command-line arguments (for stdio transport)
- Environment Variables: Key-value pairs for server configuration
- Enable/Disable Servers: Use the checkbox to toggle servers on/off without removing them
Example: File System MCP Server
A common use case is setting up a file system MCP server to allow the LLM to read and write files:
Name: Filesystem
Transport Type: stdio
Command: npx
Arguments: -y @modelcontextprotocol/server-filesystem C:\path\to\allowed\directory
This gives the LLM access to list, read, and write files within the specified directory.
Available MCP Servers
Many MCP servers are available, including:
- @modelcontextprotocol/server-filesystem: File system operations
- @modelcontextprotocol/server-github: GitHub API integration
- @modelcontextprotocol/server-sqlite: SQLite database access
- @modelcontextprotocol/server-fetch: HTTP request capabilities
- Custom MCP servers built using the MCP SDK
How It Works
When MCP is enabled:
- The LLM receives information about available tools from connected MCP servers
- When the LLM needs to use a tool, it generates a tool call in its response
- folderchat executes the tool through the MCP server
- Tool results are logged (Type: “MCP Server”) and fed back to the LLM
- The LLM uses the results to formulate its final response
Note: MCP tool execution is automatically logged in the application’s log view, showing both tool calls and their responses.
Usage
-
Launch the Application: Run
folderchat.exe -
Select Folders: Use the folder tree on the left to select directories containing documents you want to include in your knowledge base
- Process Documents:
- The application will automatically process and index documents from selected folders
- For Office/PDF documents (DOCX, XLSX, PPTX, PDF), MarkItDown converts them to markdown format, and the converted
.mdfiles are saved in the same directory as the source files - After embedding, an
embeddings.jsonlfile is created in each checked folder containing the indexed document chunks
-
Start Chatting: Type your questions in the chat interface. The AI will use both its training and the context from your documents to provide answers
- View Context: Click the “Context” button to see what document chunks are being used for the current conversation
Project Structure
folderchat/
├── folderchat/                 # Main application project
│   ├── Forms/                  # Windows Forms UI components
│   ├── Pages/                  # Blazor components
│   ├── Services/               # Business logic and services
│   │   ├── Chat/               # Chat service implementations
│   │   ├── Mcp/                # Model Context Protocol client (official SDK)
│   │   ├── IChatService.cs     # Chat service interface
│   │   ├── IRagService.cs      # RAG service interface
│   │   ├── OpenAIChatService.cs
│   │   ├── ClaudeCodeChatService.cs
│   │   └── RagService.cs       # RAG implementation
│   ├── Models/                 # Data models
│   └── wwwroot/               # Web assets for Blazor
├── python_tools/              # Python utilities
│   ├── main.py                # Main entry point for Python tools
│   ├── converter.py           # Document conversion (MarkItDown integration)
│   ├── document_parser.py     # Document parsing utilities
│   ├── embeddings.py          # Embedding generation
│   ├── indexer.py             # Document indexing
│   ├── retriever.py           # Document retrieval
│   ├── gguf_loader/           # GGUF model loading utilities
│   └── models/                # Local model storage
│       ├── chat/              # Chat model directory
│       │   └── [provider_name]/   # Provider-specific chat models
│       │       └── [model_name].gguf
│       └── embedding/         # Embedding model directory
│           └── [provider_name]/   # Provider-specific embedding models
│               └── [model_name].gguf
└── folderchat.sln             # Visual Studio solution file
Contributing
Contributions are welcome! Please feel free to submit pull requests or open issues for bugs and feature requests.
Troubleshooting
Common Issues
- API Configuration Required: Ensure you’ve configured at least one API provider in Settings
- Document Processing Fails: Check that selected folders are accessible and contain supported file formats
- Embedding Errors: Verify embedding API credentials and endpoint configuration
RAG indexing error on target PC: “did not find executable at … AppData\Roaming\uv\python\cpython-3.13.4-…”
This occurs when a non-portable .venv (created on the developer PC) was copied to the target PC and still points to a base interpreter under the developer’s AppData\Roaming\uv\python\.... Fix:
- Delete
python_tools\.venvfrom the publish folder if it exists (we exclude it in publish by default). - Prepare Python on the target PC using one of the methods in “Setup Instructions” (pip/uv/portable).
- Re-run indexing.
Supported File Formats
Text Files:
- .txt, .md, .csv
Code Files:
- .py, .js, .ts, .jsx, .tsx
- .c, .cpp, .h, .java, .cs
- .go, .rs, .rb, .php
- .swift, .kt, .scala
Configuration Files:
- .json, .yaml, .yml
- .toml, .ini, .cfg
Script Files:
- .sh, .bat, .ps1, .sql
Web Files:
- .html, .css, .xml
Office Documents (requires python_tools):
- .docx, .doc
- .xlsx, .xls
- .pptx, .ppt
License
MIT
Acknowledgments
- Built with Blazor WebView
- UI components from Krypton Toolkit
- OpenAI integration using OpenAI-DotNet
- Document processing with MarkItDown
- MCP (Model Context Protocol) support using official C# SDK